DIY | Sound Proof Server Rack
[UPDATED 2022-02-01] My home lab gear seems to be multiplying at a constant speed, and my dusty desk has run out of space a long time ago. It has also been noticed that these things can get noisy ..


My home lab gear has been laying around, on desks, on the floor, inside drawers ... generating heat, noise, and collecting a lot of dust. And I mean, a lot of dust, it is a weekly job to clean the equipment. So I started thinking about buying a rack cabinet, preferably one that would reduce noise and help to protect against dust. Currently, I don't have a separate room, where I could keep this equipment, and also my working space is just one side of the room, so preferably the rack should also blend in.

I started searching online for commercially available cabinets, but I rather quickly realized that these kinds of closed racks or cabinets cost way more than I am willing to spend on it.
I turned my searches towards DIY-built racks. I found a couple of examples that were aesthetically quite pleasing, but the exact builds were too big, tall, or too deep for the room where it will be in. Furthermore, I measured that the max device depth that I currently had was 550mm, short-sighted thinking I know, but really anything deeper and it would start blocking my access to my work desk.
"The Design"

I had previously done some hacks with Ikea furniture, so I thought that why not see if there is something that I could just easily hack to my needs. What I ended up buying was two 60 x 37 x 80 cm Ikea Metod wall cabinet frames, Ikea doors and hinges to match the cabinets and some 39 x 66 x 2550 cm drywall studs.
While searching for suitable cabinets, most were not quite deep enough. But then I had the realization that two 60 x 37 x 80 Ikea Metod wall cabinets combined would be almost a perfect depth. The internal width I could just adjust with an internal frame, which would then also join the 2 Ikea cabinets, while searching for the wood I also realized that the Dry Wall studs as such would also be a perfect fit.
The Build

The Cabinet Frames
It was exactly as Ikea promised, "Ikea Metod - Kitchens customizable according to your dreams" .. indeed that, and with these slight modifications, this kitchen cabinet can be fitted with short depth rack servers (max 550 mm deep). Even my wife got a little excited when I announced that I am buying some new kitchen cabinets. Although in the end, it turns out this kitchen cabinet is not allowed in the kitchen.

The Internal Frame
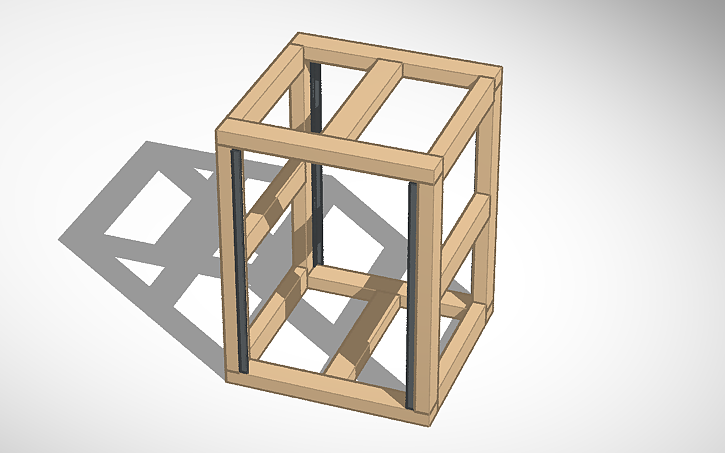
With the 39 x 66 mm wood studs, the cabinet internal width was almost perfect, and the shelf clearance is quite spot-on for a 19" rack (later I found out that it can be a bit tight fit for some devices). The internal frame made out of these studs would be sturdy enough to keep the cabinets together and also support the actual weight of the rack equipment. Plus, between the studs, I would still have plenty of space to add soundproofing materials.
Cut them to size, drilled holes for the assembly screws and finally assembled the front and back frames.
Making sure the whole time that they will fit inside the cabinets, but not attaching the frames to the cabinets yet.


At this point I wanted to also test that my gear actually will fit in. and I attached the rack rails to the internal front frame. I noticed that Unifi Dream Machine Pro was a bit snug fit, although it did go in, but scratched slightly the right side of the rack ears. Otherwise everything fitted in without any problems.
I wanted to make sure the frame would fit inside the cabinets, so I slid the front and back frames inside the cabinets and assembled the whole frame, but I did not attach them to the cabinets yet.


I attached the internal frame to the cabinets using 4 x 50 mm screws.
Rack Rails
For the rack rails I measured I could fit in 15U rails, but could not find 15U rails from anywhere (at least not in stock), so I ended up buying four 10U and four 5U rails.
Cabinet Wheels
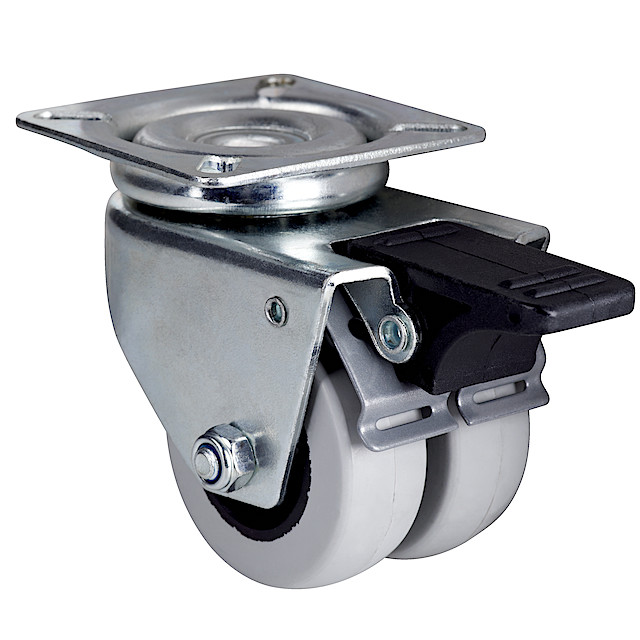
I also needed to be able to move this cabinet around, and for that, I first bought some really cheap cabinets wheels .. and the first wheel broke apart within the first week, and the rest of them within a month after that. The wheels were still holding ok, but the rubber part of the wheel just peeled off, exposing this quite thin-looking plastic core. I've now replaced these wheels with a different 2-wheel model, which each should be able to hold 75 kg.


Cooling, Air Flow, and Dust Proofing
Since this is a closed cabinet, and some relatively hot stuff will be inside, heat build-up inside the cabinet was a real concern for me. I wanted to make sure that there is proper airflow, but without bringing up the sound levels too much, or allowing dust to build up inside either.
Most of the DIY cabinets, I found pictures of, had air vents on top of the cabinets, which make a lot of sense since the hot air rises up. My problem with that placement is that I want to keep my 3D printer on top of this cabinet, and with that comes the risk that something will fall through the vents and damage the exhaust fans.
Back Door
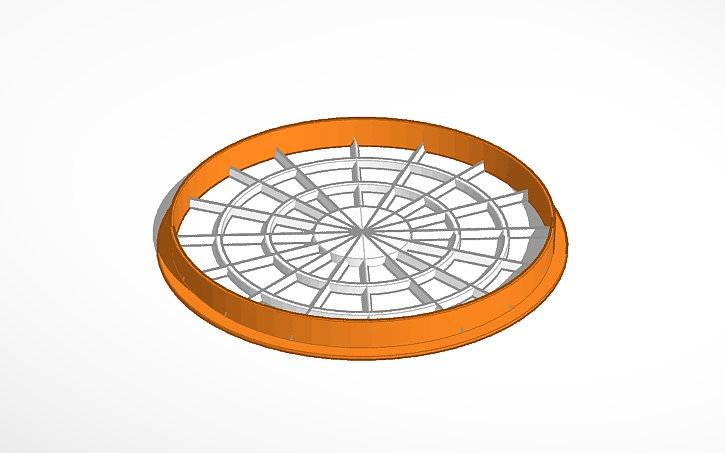
On the back door, I decided to place 2 active fans, to push out hot air. To keep the noise down, I choose to use 200 mm Noctua NF-A20 PWM fans, which are relatively silent (actually amazingly silent in my opinion), and still push out a good amount of air. For the fans, I also 3D printed exhaust fan guards.


The back door fans are controlled by Thermaltake Commander FT Touchscreen Fan Controller. This controller can control up to 5 fans, so I could add 3 more fans if needed. The controller has a thermal sensor, with automatic and manual fan speed modes. You can control each fan separately if required.

Front Door
For the front door, I opted not to use any active fans, to keep the noise levels down, but I wanted to keep that option available if later on, it would look like fans would be needed to control the internal temperatures.
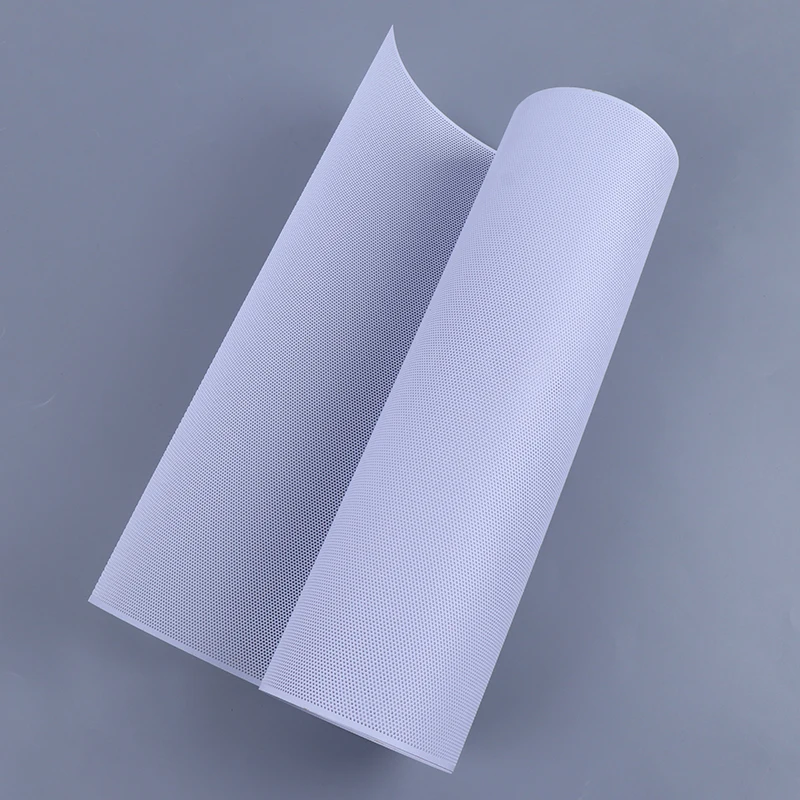
Instead of fans, I added a relatively large air intake, which would be covered with a dust mesh. I created an opening of 172 mm wide and 600 mm high, this way I could, later on, add up to three 200 mm fans to blow cooler ambient air in.

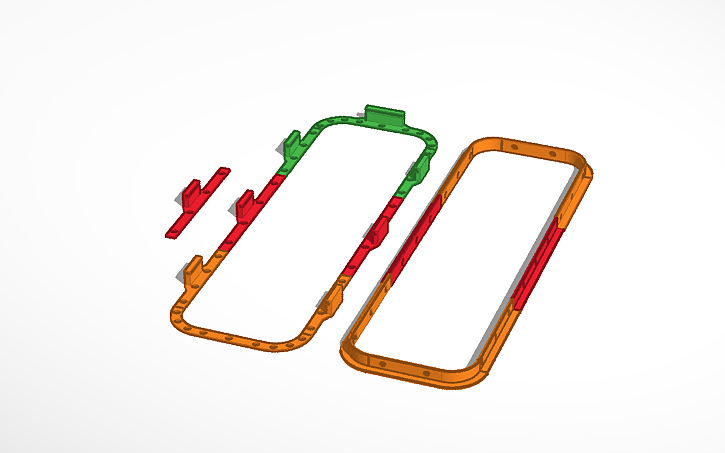
For the air intake opening I 3D printed a multi-piece frame, to hide the "ugly", not so straight saw line and also, on the other hand, to keep the dust mesh in place. And I also decided I wanted to try to add something inside the air intake opening to block sound a bit.
I first carefully drilled holes for the outside 3D printed frame parts and attached them to their places. Then I cut a piece from the mesh roll and measured the correct place for the internal 3D printed frame and drilled holes for the screws.
I placed the dust mesh under the internal frame and screwed the frame pieces carefully into their place. Then I just cut off the excess of the mesh.


Sound Proofing
I am not an expert on this matter, but I did a small "google" study on the subject and came to the conclusion that I'd want to add two different materials in layers, 1st layer to reduce or suppress resonating sounds and 2nd layer to further reduce sound reflections.

Then used carpet tape on top of the mat to add one more layer of pyramid foam mat. I secured the foam in place with small screws.
On the floor, I didn't apply any foam mat. I am planning to place my UPS and Synology NAS there.


Dust Proofing
Since there was a small gap between the doors and the cabinet, I added these small wood rims inside the cabinet and installed self-adhesive window rubber seal strips along the wooden rims to fully seal the doors from sound and dust.
For final touches, I adjusted the door hinges and added 2 small latches to both doors, to pressure them tightly against the seal.


Cabling
For the cables to go in and out of the cabinet, I drilled a 6 cm diameter hole to the bottom back edge of the cabinet .. without thinking about it too much.
Then I realized that I need to figure out how to dustproof that hole, and also prevent air from coming in all together from that hole, as I rather want to keep the airflow going from the front to back.
To keep the cables in order inside the rack, I added 8 cable hooks to the back rails

3D Prints
While you can definately complete this build without any printed parts, or instead buy some ready made parts, I wanted to use 3D prints, for the fun of it and for the unique look. I used TinkerCad to design the 3D printed components, and the desings are public so you can save some time if you want to use them in your projects, links to the designs are below. I used standard PLA material, and my Creality Ender 5 Pro for Printing.
List of parts
In no way am affiliated or sponsored with any of the companies or products linked below. These are the exact products I used in my build, depending on where you live you may or may not find exactly the same products.


 Kirjaudu


 Kirjaudu
 Kirjaudu

 Thermaltake


 Kirjaudu