HA | ESPHome, AirThings BLE Hub
Real-time air quality monitoring with ESPhome airthings_wave_plus platform, tracking AirThings Bluetooth sensors for radon, VOCs, CO2, temperature, humidity, and others depending on the device sensors.


I have an AirThings Wave Plus sensor that can track radon, VOCs, co2, temperature, humidity, and air pressure and I have been wanting to use this in my Home Assistant. The problem here has been that while there is a cloud integration the device itself only has Bluetooth connectivity requiring me to harvest data with my mobile phone, so it's not real-time info. AirThings is selling a hub that would allow (near) real-time information, but 70€ for just for a hub and still be dependent on the cloud integration, sounds expensive, so I have been pushing this off for a while.
While searching for solutions to another project noticed that ESPhome has an alternative for the hub. I am already using ESPHome as an addon in my Home Assistant, so I thought I'd give this a go. I recently bought bunch of ESP32s for my ESPresense "project", so I thought I'd "sacrifice" one of the 5€ microcontrollers for this.


ESPHome
One of the cool things about ESPHome is that you don't necessarily need to connect the ESP32 to the host server. In my case that would mean that I need to open my rack, plug in a USB cable to my Intel NUC which is running VMware ESXi and Home Assistant as a VM, and then set up ESXi to pass through the ESP32 to my Home Assistant. Instead, I can use my laptop, open ESPhome in my web browser (works with Google Chrome or Microsoft Edge), connect the ESP32 with a USB cable to my laptop and Install ESPHome into the ESP32. Once the initial installation is done, I can plug the USB cable from the laptop, power up the ESP32, and do whatever over the air (OTA) configuration changes I need.
Initial Installation
Only the initial installation requires that the ESP device is physically connected with a USB cable to your computer, so I attached my ESP device to my laptop with a USB cable.
On my laptop, I open my Home Assistant using a web browser, open ESPhome addon, click New Device and give it a name.

ESPhome already has my IoT wifi network credentials saved, so it will automatically set that as the device Wi-Fi network. If you are doing this the first time it will ask you for your Wi-Fi credentials. After completed click Next

Click Connect, select your device from the Popup (this part only works with Chrome or Edge), and click Connect and let it install.


Now you can disconnect the USB cable from your computer and power up the ESP device through the USB cable where you want and you can control the settings through ESPhome.
Device Discovery
First, we need to find out the AirThings Bluetooth MAC address. For this, we edit the ESPhome configuration for our just-installed device.
Well add couple of lines to the configuration for the discovery
logger:
  level: DEBUG # Required for the tracker to show the device

esp32_ble_tracker:
airthings_ble:Click edit on the ESPhome Device and add those lines to your configuration
esphome:
  name: airthings-ble-hub

esp32:
  board: esp32dev
  framework:
    type: arduino

logger:
  level: DEBUG # Required for the tracker to show the device

# Enable Home Assistant API
api:

ota:
  password: "####################################"

wifi:
  ssid: !secret wifi_ssid
  password: !secret wifi_password

  # Enable fallback hotspot (captive portal) in case wifi connection fails
  ap:
    ssid: "Airthings-Ble-Hub"
    password: "###############"

captive_portal:

esp32_ble_tracker:
airthings_ble:Once added, click install and the OTA install will run.

Once the installation is complete you should see something like this on the log screen.
[13:42:34][D][airthings_ble:022]: Found AirThings device Serial:2110011119 (MAC: AA:DB:31:56:D7:2A)The MAC address is the one we need for the next step.
Device Configuration
Again let's edit the configuration. now we can disable the discover and debug level logging by commenting them out in the configuration
esphome:
  name: airthings-ble-hub

esp32:
  board: esp32dev
  framework:
    type: arduino

logger:
#  level: DEBUG # Required for the tracker to show the device

# Enable Home Assistant API
api:

ota:
  password: "####################################"

wifi:
  ssid: !secret wifi_ssid
  password: !secret wifi_password

  # Enable fallback hotspot (captive portal) in case wifi connection fails
  ap:
    ssid: "Airthings-Ble-Hub"
    password: "###############"

captive_portal:

esp32_ble_tracker:
#airthings_ble:
Next, let's add the AirThings Wave Plus device configuration (If you have a different device check the configuration from ESPHome site)
esphome:
  name: airthings-ble-hub

esp32:
  board: esp32dev
  framework:
    type: arduino

logger:
#  level: DEBUG # Required for the tracker to show the device

# Enable Home Assistant API
api:

ota:
  password: "#############################"

wifi:
  ssid: !secret wifi_ssid
  password: !secret wifi_password

  # Enable fallback hotspot (captive portal) in case wifi connection fails
  ap:
    ssid: "Airthings-Ble-Hub"
    password: "##############"

captive_portal:

esp32_ble_tracker:
#airthings_ble:

sensor:
  - platform: airthings_wave_plus
    ble_client_id: airthings_plus_01
    update_interval: 5min # default
    temperature:
      name: "Airthings Wave Plus Temperature"
    radon:
      name: "Airthings Wave Plus Radon"
    radon_long_term:
      name: "Airthings Wave Plus Radon Long Term"
    pressure:
      name: "Airthings Wave Plus Pressure"
    humidity:
      name: "Airthings Wave Plus Humidity"
    co2:
      name: "Airthings Wave Plus CO2"
    tvoc:
      name: "Airthings Wave Plus VOC"

ble_client:
  - mac_address: AA:DB:31:56:D7:2A # Use your MAC address
    id: airthings_plus_01
Once completed, again click Install and let the OTA installation complete.

Once successfully completed you close ESPHome and go to Home Assistant Integrations. For me, the device was already auto-discovered so I clicked configure and the device was ready and populated with the configured sensors.

Now I can use the real-time information for automatically turning on Air Purifiers, for alerts, or just for plain statistics.


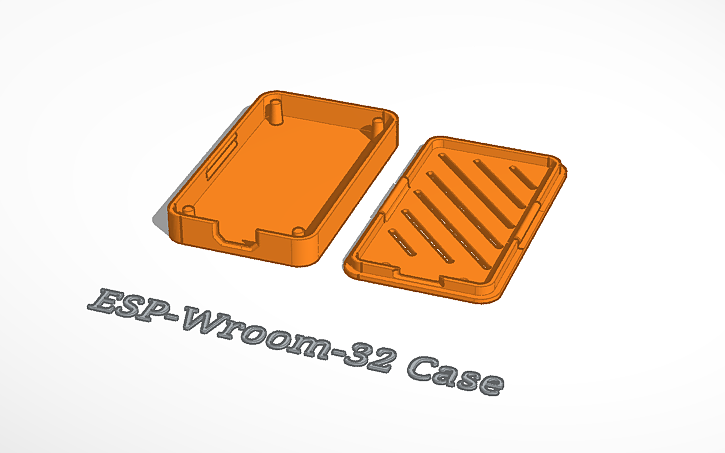
3D Printed Case
Naturally I needed a nice case for the ESP32, and I designed this minimalistic case with TinkerCad.
You can download the STL file from here or go to TinkerCad and make a duplicate of the project, and you can modify/export it to your needs.